Choosing Your Oil Pastel Brand
Choosing the right oil pastel brand can shape your drawing experience. Different brands offer various qualities of oil pastels, aiming at different levels of artists, from beginners to professionals. Here are key points to consider when selecting a brand for your oil pastel drawing that is easy and beautiful:
Quality:
High-quality oil pastels have better pigment, which gives vibrant colors and a smooth finish. They may cost more but are worth the investment.
Texture:
Some oil pastels are softer and blend more effortlessly than others. If you like to work with layers or want more control over blending, consider the texture.
Color Range:
A brand with a wide range of colors opens up possibilities for creativity. Look for sets that offer both vivid and subtle shades.
Price:
Have a budget in mind. There are affordable options for beginners that still offer good quality results.
Recommendations:
Read reviews and ask other artists about their preferred brands. Personal experience from peers can be invaluable.
Compatibility:
Ensure that the brand you choose works well with your paper or canvas. Some pastels work better on certain surfaces.
When starting with oil pastel drawing that is easy and beautiful, it may be tempting to opt for the cheapest options. However, remember that the quality of your pastels can impact the final result. You do not need to buy the most expensive set, but finding a balance between cost and quality will serve you well as you begin exploring this colorful medium. As you gain experience, you can upgrade your pastels incrementally. Start with a small, basic set to experience what different brands have to offer.
Essential Materials and Tools for Beginners
To start an oil pastel drawing that’s both easy and beautiful, you need the right materials and tools. Here’s a list to help beginners gather what’s essential:
- Oil Pastels: Start with a basic set from a trusted brand. Color variety is key.
- Paper or Canvas: Choose a surface that works well with oil pastels. Heavyweight paper is good.
- Sketching Pencil: Use this for light outlines before you apply color.
- Eraser: Get a kneadable eraser to adjust your sketches without smearing.
- Fixative: This spray will help to set your art and prevent smudging.
- Blending Tools: Fingers work, but paper stubs or tortillons give more precision.
- Protective Sheet: To keep your workspace clean.
- Storage Box: To organize and protect your oil pastels.
Each item plays a part in your creative journey. High pigment oil pastels give you rich colors. Rough paper or a textured canvas grabs the pastels better, enhancing your work. Light sketching before adding color aids in composition. An eraser helps correct mistakes. A fixative will preserve your drawings over time. Blending tools offer smoother gradients and mixing of colors. A protective sheet and a storage box keep your tools and space tidy. Gather these supplies, and you’re ready for the next step in creating oil pastel drawing easy and beautiful artwork.
Preparing the Canvas or Paper
Before you start your oil pastel drawing that is easy and beautiful, it’s vital to prepare your surface. Whether you choose canvas or paper, here’s how to get it ready:
- Choose Your Surface: Select heavyweight paper designed for oil pastels or a primed canvas that can hold the layers of color.
- Size Matters: Think about the size of your project. Larger sizes give more room for detail but can be more daunting for beginners.
- Texture Check: Make sure the texture is to your liking. Rougher surfaces help the oil pastels grip and blend better.
- Cutting to Size: If your surface is too big, cut it to a manageable size. Use a ruler and a sharp blade for a clean edge.
- Securing the Paper: If using paper, tape it down on a board. This stops it from moving as you draw.
Preparing the surface well ensures that your oil pastel artwork starts on the right foot. It helps you smoothly apply and blend your pastels for a better-looking finish. Now, you’re set to begin using the basic techniques for your oil pastel drawing easy and beautiful project.
Basic Techniques to Start With
Creating oil pastel drawing easy and beautiful starts with mastering some basic techniques. These foundational skills will help you express your vision effectively and with confidence. Here’s what you should learn as a beginner:
- Stippling: Make small dots with your pastels to add texture.
- Scumbling: Apply controlled scribbles to build volume and layers.
- Blending: Use your fingers or a blending tool to mix colors seamlessly.
- Layering: Place colors on top of each other to achieve depth.
- Sgraffito: Scratch off layers to reveal colors beneath for sharp details.
- Feathering: Create soft lines that mimic the look of feathers.
Remember to start with light pressure when applying your oil pastels. This approach makes it easier to add layers. Keep your hand relaxed, and gradually build up to the intensity of color you desire. Practice these techniques on scrap paper to get a feel for how the oil pastels behave. Over time, you will find that these basic skills become second nature, setting the stage for more advanced work in your oil pastel drawing easy and beautiful journey.
Step-by-Step Creation of an Oil Pastel Piece
Embarking on your oil pastel drawing easy and beautiful begins with a clear concept. Here’s a guide to craft your piece step by step:
- Conceptualize Your Artwork: Decide what you want to draw. Start with something simple.
- Create a Rough Sketch: Use your sketching pencil for a light outline on your canvas or paper.
- Apply Your Base Colors: Choose your lightest colors for the first layer. Apply them gently.
- Enhance with Details: With your base set, add layers of mid-tones and darker shades to bring out details.
- Focus on Light and Shadow: Understand where your light source is. Use shadows and highlights to create dimension.
- Implement Texturing Techniques: Use stippling or scumbling to add texture to your artwork.
- Refine Edges: Clean up any rough edges with a smaller pastel or a scraping tool.
- Final Touches: Adjust the intensity of colors and refine your blending to complete your piece.
This gradual process allows you to manage complexity and build up your drawing in layers. By starting simple and gradually adding details, your oil pastel creation will emerge vibrant and dynamic, yet remain an oil pastel drawing easy and beautiful masterpiece suitable for all levels of proficiency. Remember to work at your own pace, step by step, ensuring each stage is completed before moving on to the next. Enjoy the process and watch as your creation takes shape.
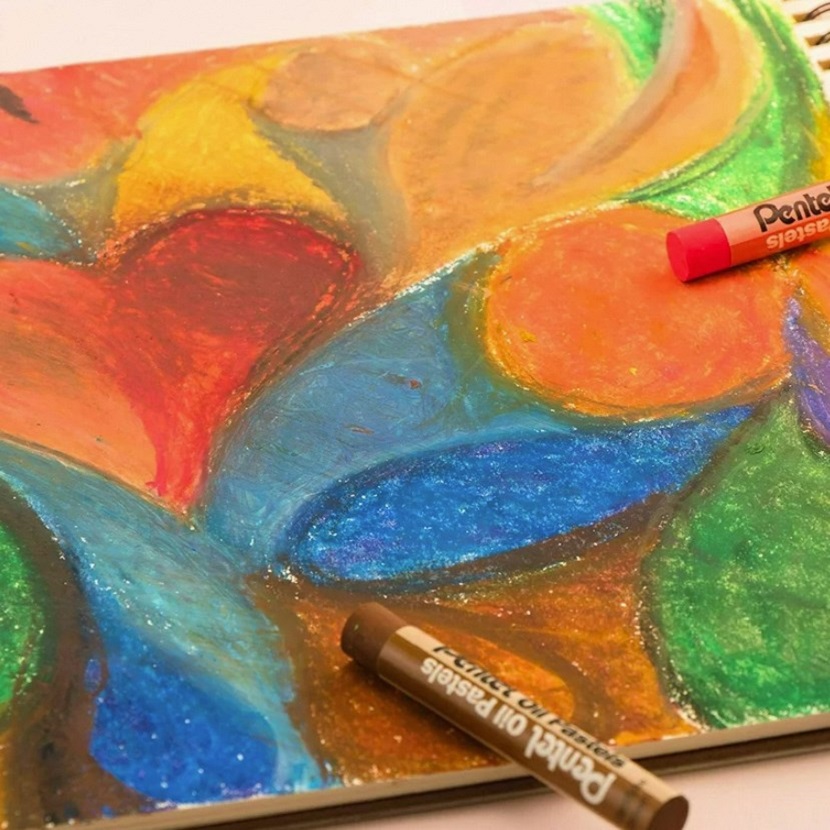
Blending and Layering Colors
When working on an oil pastel drawing that’s both easy and beautiful, blending and layering are key. They bring life and depth to your art. Here’s how to do it right:

- Start with Light Colors: Begin with the lightest colors in your palette. These form the base of your drawing.
- Layer Darker Tones: Gradually add darker colors on top. Use gentle pressure to avoid crushing the light base.
- Blending: Use your fingers, blending stumps or tortillons. Smooth transitions between colors create a natural look.
- Practice Patience: Good blending takes time. Don’t rush it. Work slowly to blend colors seamlessly.
- Direction Matters: Blend colors in the direction of the shape or form you’re drawing. It adds to the realism.
- Mix on a Palette: If needed, use a spare piece of paper to mix colors before applying them.
Remember, the beauty of oil pastel drawing easy and beautiful lies in the subtle nuances of color. Thorough blending and careful layering can make your artwork stand out. Be bold and experiment with different color combinations to find what works best for your piece.
Tips for Fixing Mistakes in Oil Pastel
Mistakes are common when creating oil pastel drawings that are easy and beautiful. Luckily, they can be fixed with ease. Here’s what to do:
- Use a Kneadable Eraser: Lightly dab the eraser on the mistaken area. It lifts the oil pastel without smudging.
- Scrape Away Pastel: A scraping tool removes the top layer of pastel. It reveals the layer beneath for correction.
- Layer Over Mistakes: Simply cover the area with another color. Choose a darker shade to mask the original mistake.
- Blend Edges: To merge the corrected area with the rest of your artwork, blend the edges well.
- Be Gentle: Always be gentle to avoid damaging your paper or canvas.
Remember, practice makes perfect. With time, you’ll make fewer mistakes and gain confidence in your skills.
Sealing and Preserving Your Artwork
After you’ve created your oil pastel drawing easy and beautiful, it’s important to protect it. Here’s how to seal and preserve your artwork:
- Choose the Right Fixative: Get a fixative spray designed for oil pastels. It will set your drawing without altering the vibrant colors.
- Spray Evenly: Hold the can at a distance and spray an even coat over your artwork. Do this in a well-ventilated area.
- Let It Dry: Wait for the fixative to completely dry. This can take a few hours, so be patient.
- Apply Multiple Coats: For extra protection, apply a second or third coat. Allow each layer to dry fully before adding another.
- Handle With Care: Once sealed, handle your art with care. Even a sealed drawing can be vulnerable to scratches and smudges.
- Frame or Store: Place your artwork in a frame behind glass to keep it dust-free. If storing, lay it flat in a dry place.
Sealing your artwork ensures that it stays as beautiful as the day you completed it. With your oil pastel drawing easy and beautiful now preserved, you can enjoy your creation for years to come. Plus, proper preservation prepares your artwork for display, gifting, or even sale.