The Essentials of Oil Pastel Art
Before you can begin your oil pastel candle drawing, it’s important to understand the medium. Here are some key points to keep in mind:
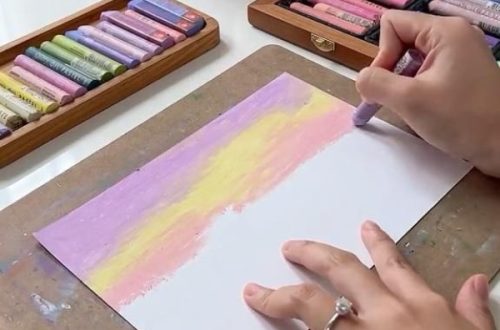
- Oil pastels are pigments mixed with a non-drying oil and wax binder. This creates a creamy texture that is easy to blend.
- They come in a variety of forms, from sticks to crayon-like shapes. This range provides versatility in application and technique.
- Paper selection is crucial. A paper with a good grip or ‘tooth’ allows for better layering and blending of oil pastels.
- Oil pastels never fully dry, which means they can smudge easily. Working gently is key to maintaining your image.
- Layering is a common technique using oil pastels. It allows you to build up color and depth in your drawings.
Understanding these essentials will help you leverage the full potential of oil pastels in your candle drawing, ensuring vibrant, textured, and luminous results.
Choosing the Right Materials for Your Candle Drawing
Selecting the ideal materials is crucial for your oil pastel candle drawing. It can affect color richness and final texture. Here are the essentials:
- Start with the right paper. Choose one that is thick and has texture. This helps to hold the pastels better.
- High-quality oil pastels. Invest in pastels with high pigment load for vivid colors.
- A kneaded eraser. This eraser can pick up pastel without damaging the paper.
- Fixative. A final fixative spray will protect your drawing from smudges and dust.
- Blending tools. You can blend with your fingers, paper stumps or blending brushes.
Gather these materials before you start your drawing. They will make the process smoother and the outcome more striking. Use the right tools to blend and layer colors for a rich, multi-dimensional candle art piece.

Step-by-Step Guide to Creating a Candle Artwork with Oil Pastels
Now that you have your materials ready, let’s dive into the step-by-step process of creating your oil pastel candle drawing. This will guide you from the initial sketch to the final touches.
- Start with a Light Sketch. Use a pencil to draw a simple outline of your candle and its flame. Keep the lines soft so you can cover them with pastels later.
- Apply the Base Colors. Choose your colors and fill in the larger areas. Press lightly for an even base layer.
- Build Up Colors and Shades. Add darker tones to create depth, especially around the candle’s wick and the flame’s base. Layer lighter colors on top to bring highlights.
- Blend Your Layers. With your finger or a blending tool, softly merge the colors where they meet. Blending helps achieve a smooth transition between shades.
- Define the Flame. Use bright yellows and oranges for a vibrant flame. Remember, flames are more intense at the center, so use lighter colors there.
- Add Details and Textures. Work on small sections to add the texture of melting wax or the flicker of the flame. This will make your drawing more realistic.
- Adjust Contrast and Brightness. Review your artwork. Boost contrast where needed with darker tones or increase brightness with lighter shades.
- Final Touches. Clean the edges with a kneaded eraser. It can also lighten areas that are too dark or smudged.
Following these steps, you will create a beautiful oil pastel candle drawing that captures the warmth and serenity of a flickering candle. Remember to enjoy the process and let your creativity flow!
Tips and Techniques for Working with Oil Pastels
When mastering oil pastel candle drawing, knowing various tips and techniques is essential. Here are some to consider:
- Keep Your Pastels Clean: Dirty pastels can muddy your colors. Clean them often with a tissue.
- Layering Is Key: Build up colors gradually. This brings depth and vibrancy to your drawing.
- Use a Scraping Technique: Scraping away layers can reveal colors underneath, adding a unique texture.
- Control Your Pressure: Heavy pressure will lay down more pigment. Use this for deep shadows or bold areas.
- Try Different Blending Methods: Experiment with blending tools. Each one gives a different effect.
- Work from Dark to Light: This helps maintain the intensity of your lighter colors and highlights.
- Test Colors on Scrap Paper: Before applying, test them to avoid surprises in color blending.
- Keep a Paper Towel Handy: Clean your fingers or blending tools as they pick up pastels.
- Embrace Your Mistakes: Sometimes, unexpected results lead to creative discoveries. Don’t be afraid to experiment.
Incorporate these techniques into your oil pastel candle drawing to elevate your art’s overall effect. Stay patient, enjoy the process, and watch your skills grow with practice.

Incorporating Colors and Textures in Candle Drawings
Incorporating diverse colors and textures is crucial in bringing your oil pastel candle drawing to life. To create a visually engaging candle artwork, follow these targeted techniques:
- Choose a Color Palette: Start by selecting colors that fit the mood you’re aiming for. Warm tones can mimic a candle’s glow, while cooler tones may suggest a different atmosphere.
- Create Texture with Layering: Apply oil pastels in layers to build texture. Thick layers can represent melting wax, whilst light strokes can simulate a flickering flame.
- Use Contrasting Colors for Depth: Place contrasting colors next to each other to make elements pop. Darker colors around the candle wick can give the illusion of depth.
- Incorporate Highlights and Shadows: Highlights and shadows are key to creating a realistic look. Add a soft touch of white or yellow for the flame’s glow and deeper shades for shadows.
- Experiment with Blending: Blending can produce a range of textures. Try different tools for varied effects.
- Consider the Direction of Light: The light source will affect how the colors and textures appear. It should guide the placement of your highlights and shadows.
Apply these principles to enhance the visual impact of your candle drawings with oil pastels. Remember, the beauty of art lies in experimentation, so don’t be afraid to mix colors and textures until you achieve your desired outcome. Keep practicing, and watch as your candle art becomes more vivid and lifelike with each creation.
Finishing Touches: Sealing and Preserving Your Artwork
After you’ve invested time and effort into creating your oil pastel candle drawing, it’s important to protect it. Here’s how to seal and preserve your artwork for longevity:
- Use a Fixative Spray: Choose a quality fixative spray designed for oil pastels. Spray it evenly over your drawing to prevent smudging and fading.
- Apply Gently: Hold the can at a distance and spray with a gentle back-and-forth motion. This avoids heavy application that might disturb the pastel particles.
- Allow it to Dry: After spraying, let your artwork dry completely. This creates a protective layer that locks in the colors.
- Store Correctly: Keep your drawing in a place away from direct sunlight. This helps maintain the vibrancy of your colors.
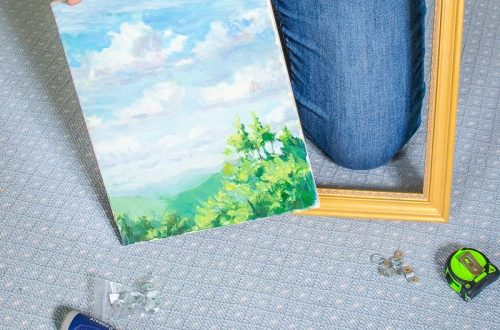
- Frame Behind Glass: If you display your artwork, place it behind glass. This shields it from dust, touch, and environmental damage.
By following these steps, you give your oil pastel candle drawing the best chance to stay beautiful for years. Always handle your artwork with care and take the time to protect it properly.
Inspiration and Ideas for Your Next Candle Art Project
Finding fresh inspiration for your oil pastel candle drawings can be as enlightening as the candles you depict. Here are some ideas to spark your creativity:
- Draw from Life: Light a candle and observe it. Notice how the light dances and changes. Try to capture this in your art.
- Use Different Candle Shapes: Not all candles are cylindrical. Some are square, spiral or even sculptural. Drawing different shapes can add intrigue to your art.
- Mix in Other Elements: Place objects around the candle, like flowers or pebbles, for a still life composition.
- Experiment with Backgrounds: Don’t just focus on the candle. Try dark, light, or colorful backgrounds to set a mood.
- Seasonal Themes: Create candles fit for different seasons. Think pumpkins for fall or snowflakes for winter.
- Celebrate Occasions: Candles are symbols of celebration. Make art for birthdays, holidays, or anniversaries.
- Play with Shadow and Light: Extreme shadows and bright highlights can give a dramatic effect to your drawing.
Use these suggestions, mixed with your unique style, and watch as your oil pastel candle drawings glow with new life. Just like candles themselves, your art can be a source of warmth and joy. Keep experimenting with colors, textures, and concepts. Every drawing is a new opportunity to shine.
Showcasing Your Oil Pastel Candle Art
After creating your oil pastel candle drawing, it’s time to showcase it. Presenting your artwork can be as fulfilling as the creative process itself. Here are some ways to display your candle art effectively:

Select the Right Frame:
Choose a frame that complements your drawing without overpowering it. A simple, elegant frame can enhance its beauty.
Consider Matting:
Matting can add a border around your art. This helps to highlight the candle drawing and protect its edges.
Pick a Spot With Good Lighting:
Display your art where there is gentle, natural light. This brings out the rich colors you worked hard to blend.
Avoid Humid Areas:
Keep your drawing in a dry place. Humidity can harm the oil pastels and cause smudging over time.
Show it Online:
Share your creation on social media or art websites. This lets others see your artwork and can bring you valuable feedback.
Create a Gallery Wall:
If you have multiple pieces, display them together. A gallery wall can tell a story with your candle drawings.
Remember, showcasing your art is part of your artistic journey. It validates your efforts and can inspire others to explore their creativity. Be proud of your oil pastel candle drawing and give it the attention it deserves by displaying it properly.


