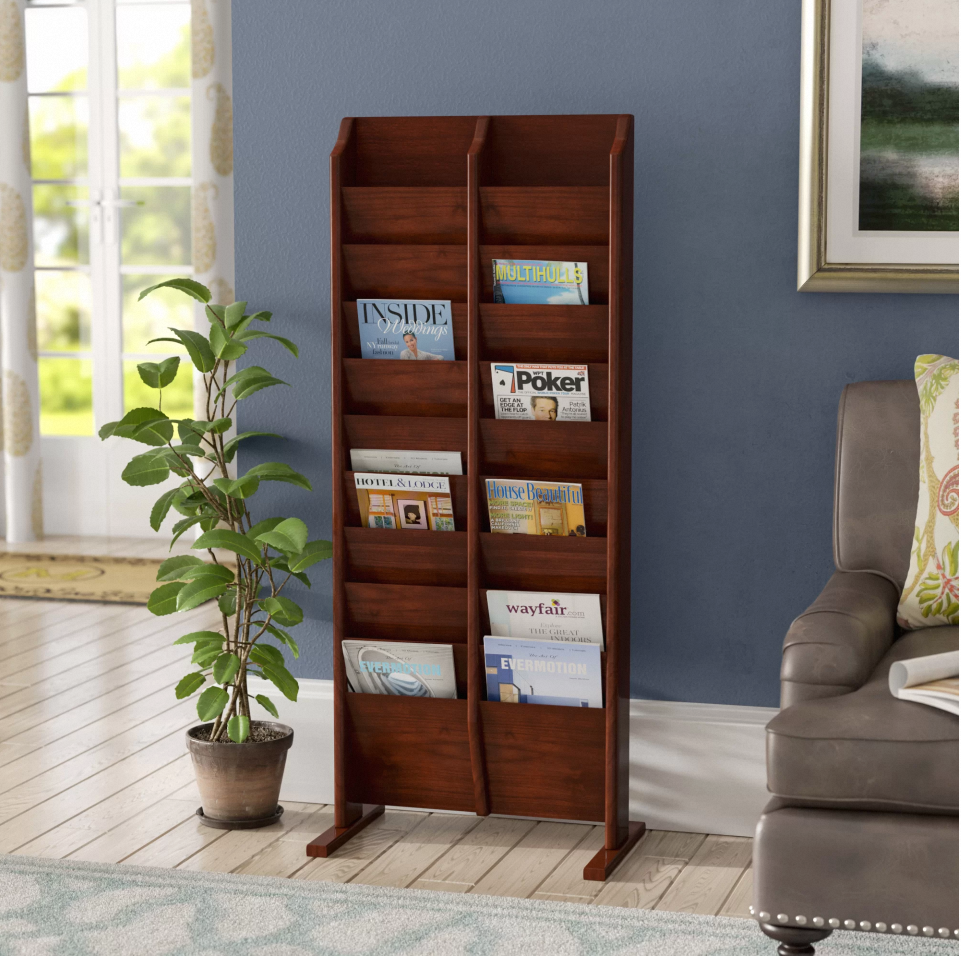
Are you tired of having your kitchen utensils scattered all over your countertops and drawers? Do you wish for a more organized and efficient way to store them? Look no further! In this DIY project, we will show you how to transform a simple magazine holder into a stylish and functional kitchen utensil organizer. Not only will this project help you declutter your kitchen, but it will also add a touch of creativity to your space. So, let’s get started!
Materials Needed:
- Magazine holder (wooden or metal)
- Sandpaper
- Spray paint or paintbrush and paint
- Paint primer (if necessary)
- Adhesive paper or fabric
- Scissors
- Glue
- Decorative elements (optional)
Step 1: Prepare the Magazine Holder
The first step is to prepare the magazine holder for transformation. If you are using a wooden holder, start by sanding the surface to remove any rough edges or imperfections. If you are using a metal holder, wipe it with a damp cloth to remove any dirt or dust.
Step 2: Prime and Paint
Next, apply a coat of primer to the magazine holder if you are using a wooden one. This will help the paint adhere better and provide a smoother finish. Let the primer dry completely before moving on to the next step.
Once the primer is dry, it’s time to paint your magazine holder. Choose a color that matches your kitchen decor or opt for a vibrant shade to add a pop of color. You can use spray paint for a quick and even application or use a paintbrush and paint for a more detailed finish. Apply multiple coats if necessary, allowing each coat to dry before applying the next.
Step 3: Add a Decorative Touch
To make your kitchen utensil organizer even more visually appealing, consider adding a decorative element to it. You can use adhesive paper or fabric to cover the inside or outside of the magazine holder. Cut the paper or fabric to the desired size and carefully glue it onto the surface, ensuring there are no wrinkles or bubbles. This will not only add a personal touch to your organizer but also protect it from scratches and stains.
Step 4: Customize the Compartments
Now it’s time to customize the compartments of your utensil organizer. Depending on the size of your magazine holder, you can create multiple sections to store different utensils separately. Measure the width of the holder and cut dividers from a piece of cardboard or foam board. Glue these dividers onto the base of the magazine holder, creating compartments of different sizes. Make sure to leave enough space for your utensils to fit comfortably.
Step 5: Arrange Your Utensils
Once the glue has dried, it’s time to start arranging your utensils in the newly created compartments. Sort your utensils by type – spoons, spatulas, tongs, etc. – and place them in their designated sections. This will make it easier for you to find the utensils you need while cooking and keep them neatly organized.
Step 6: Optional: Add Extra Storage
If you have additional space on top of your magazine holder, you can utilize it for extra storage. You can add hooks to hang measuring spoons, oven mitts, or even a small kitchen towel. This will maximize the functionality of your utensil organizer and make it a one-stop solution for all your kitchen needs.
Step 7: Creating Dividers
To keep your utensils organized, create dividers within the compartments of the magazine holder. Measure the desired width and height of each divider and cut them out of sturdy cardboard or foam board. Hot glue the dividers into place, ensuring they fit securely and provide adequate separation for your utensils.
By following these simple steps, you can transform a basic magazine holder into a stylish and efficient kitchen utensil organizer. Not only will this project help you declutter your kitchen countertops and drawers, but it will also add a personal touch to your space. So, grab your magazine holder and get ready to create a functional and visually appealing organizer for all your kitchen utensils. Get creative and have fun with this DIY project!